ReluxDesktop – Allign objects to external walls
A good aligment is key..
Explanation
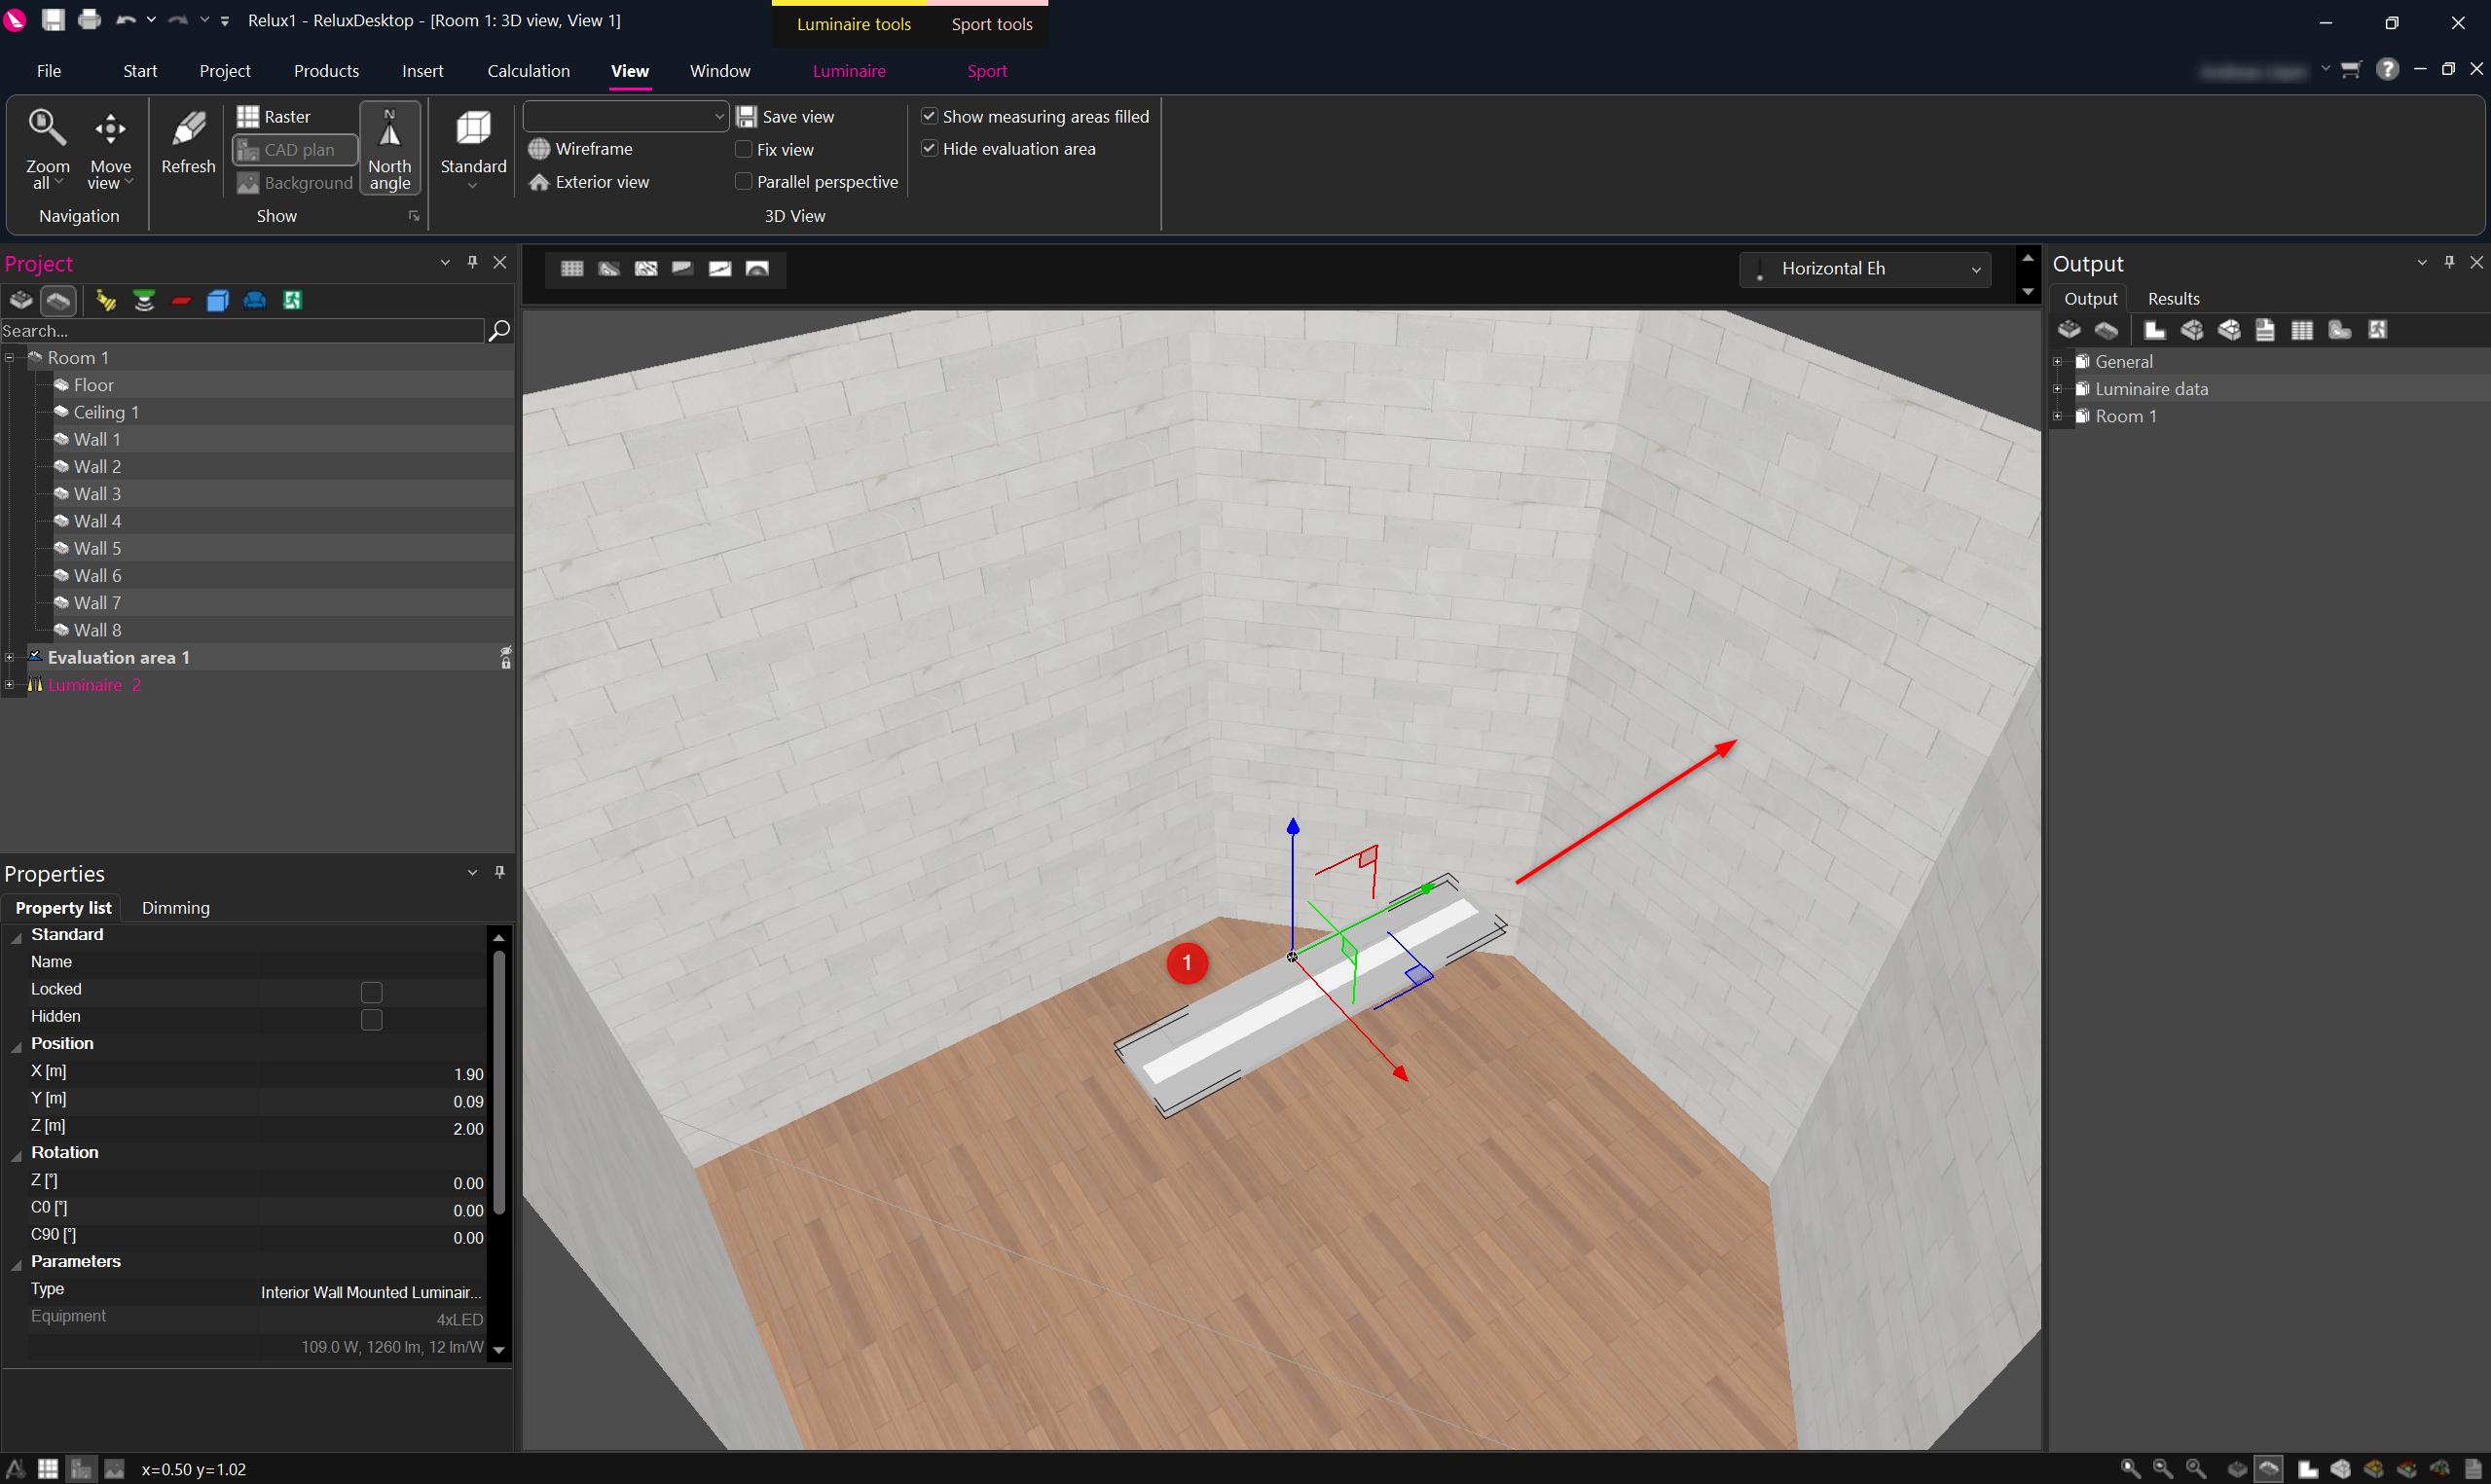
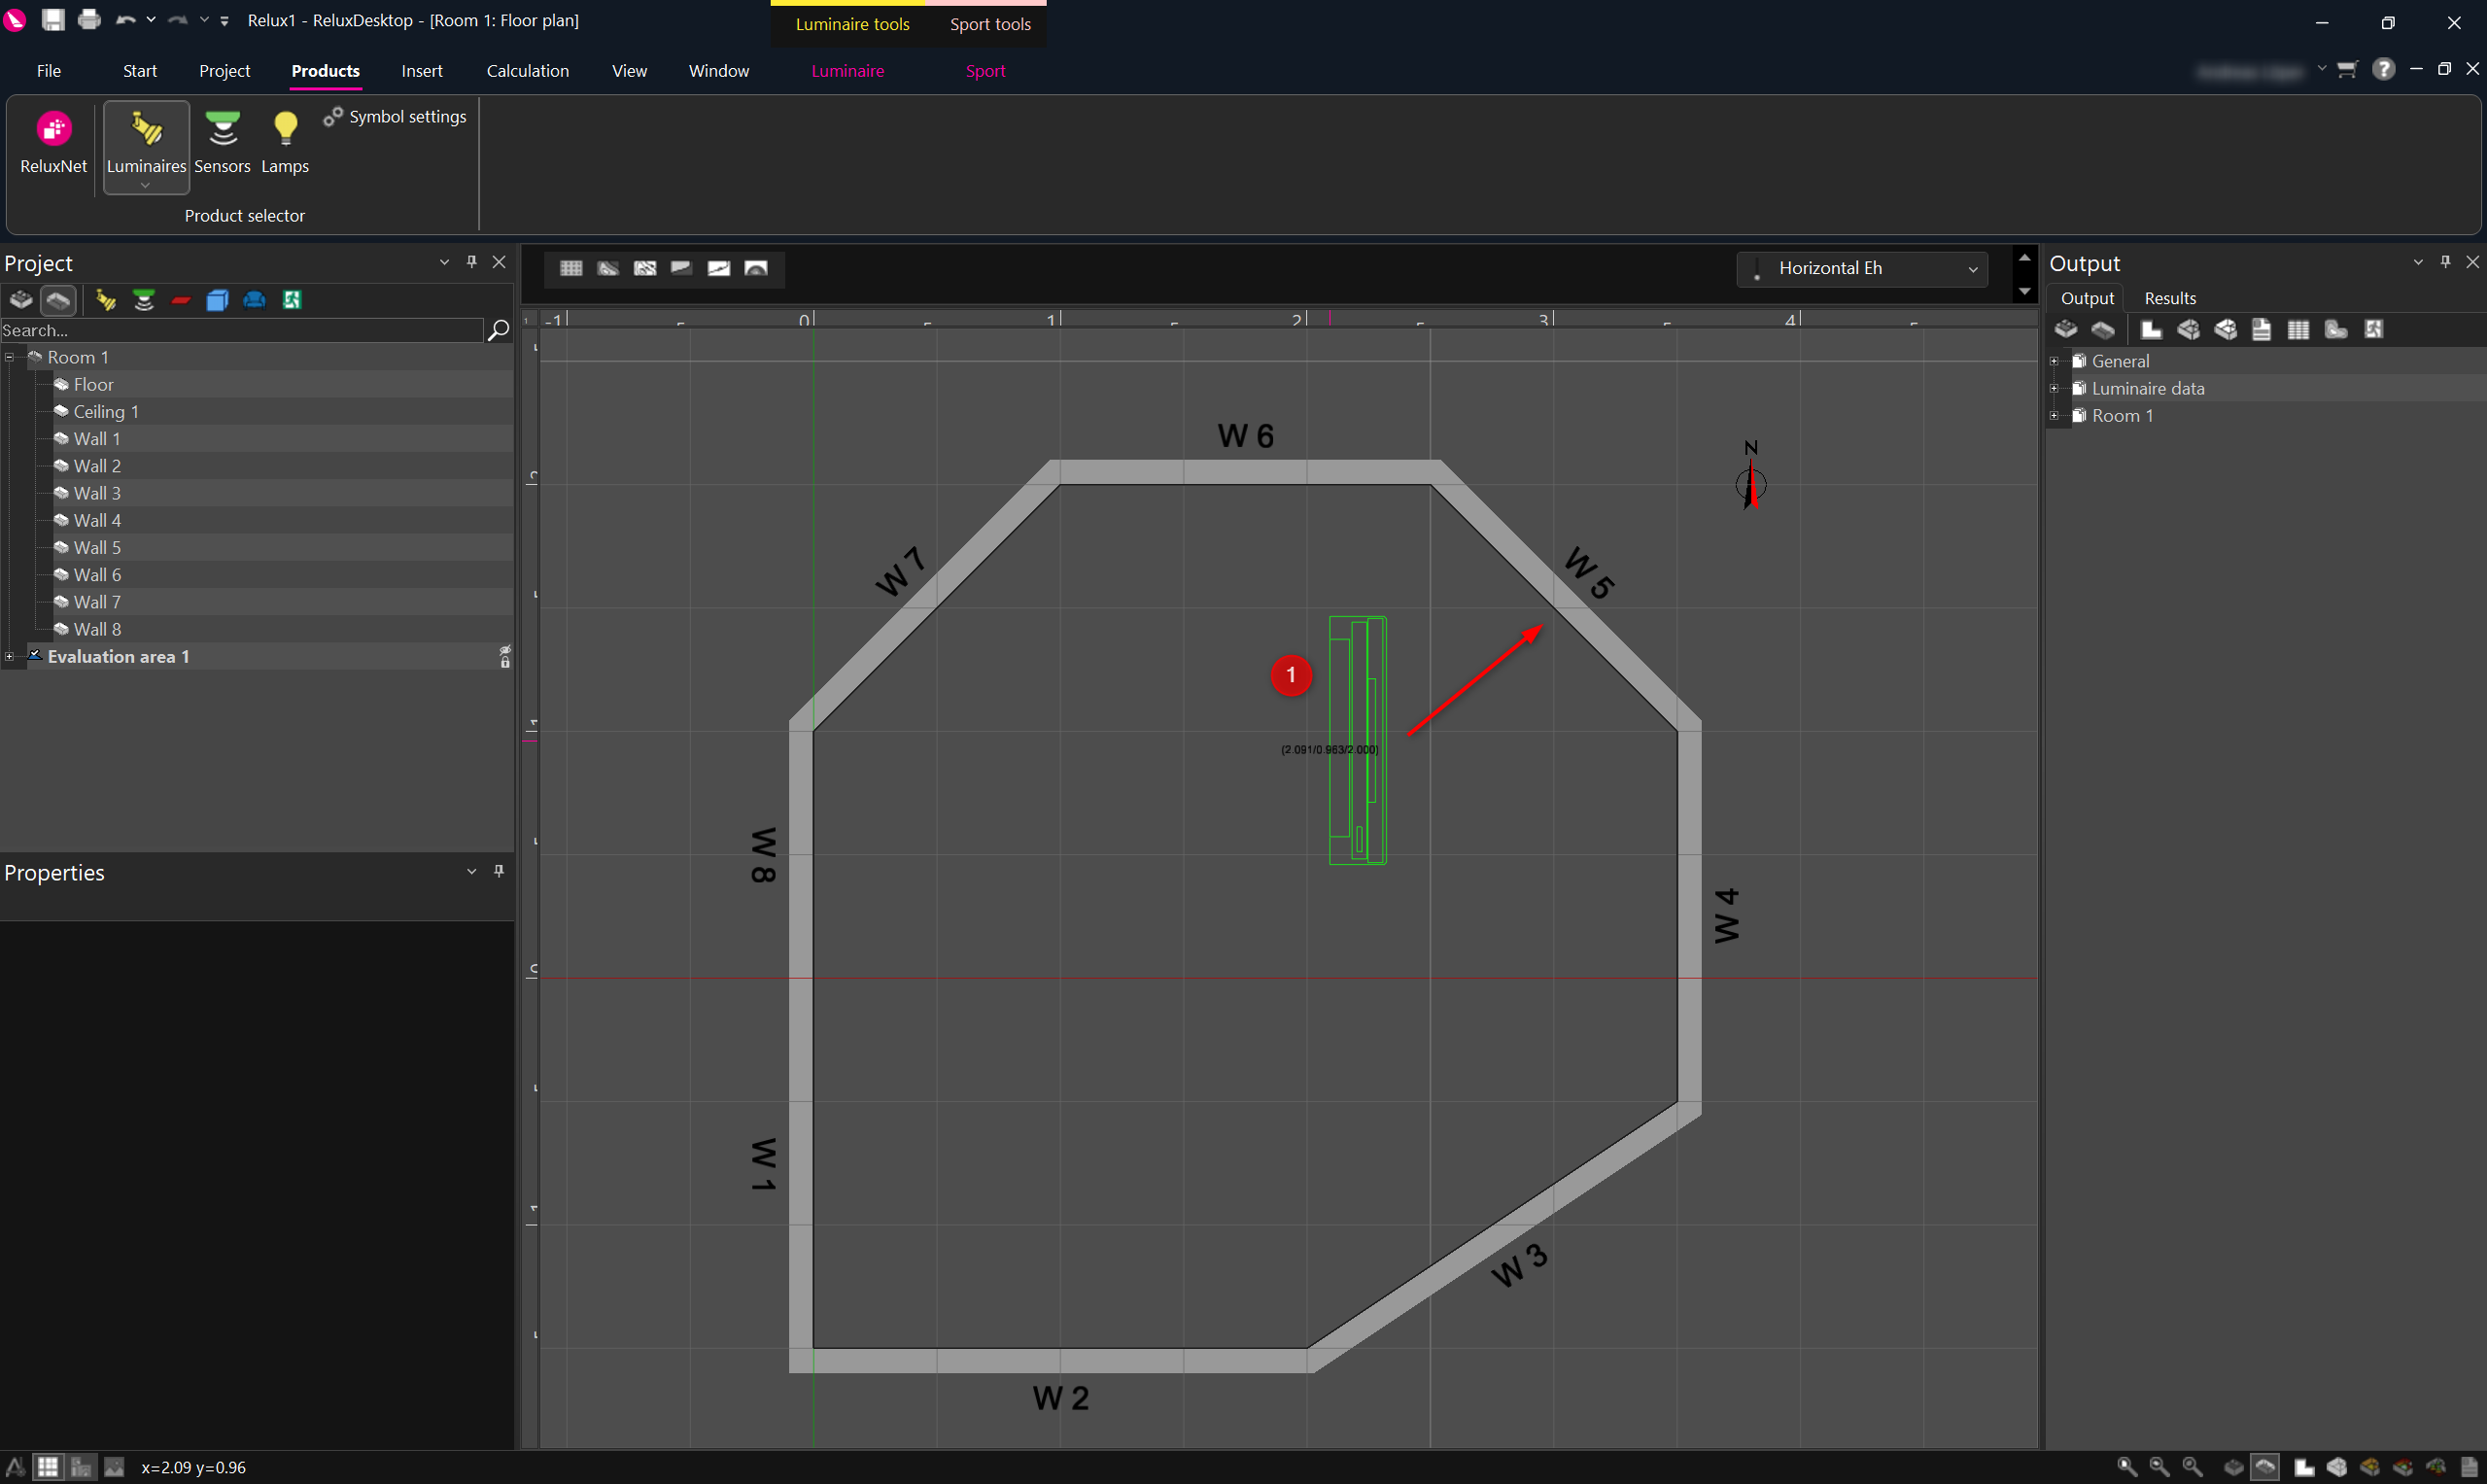
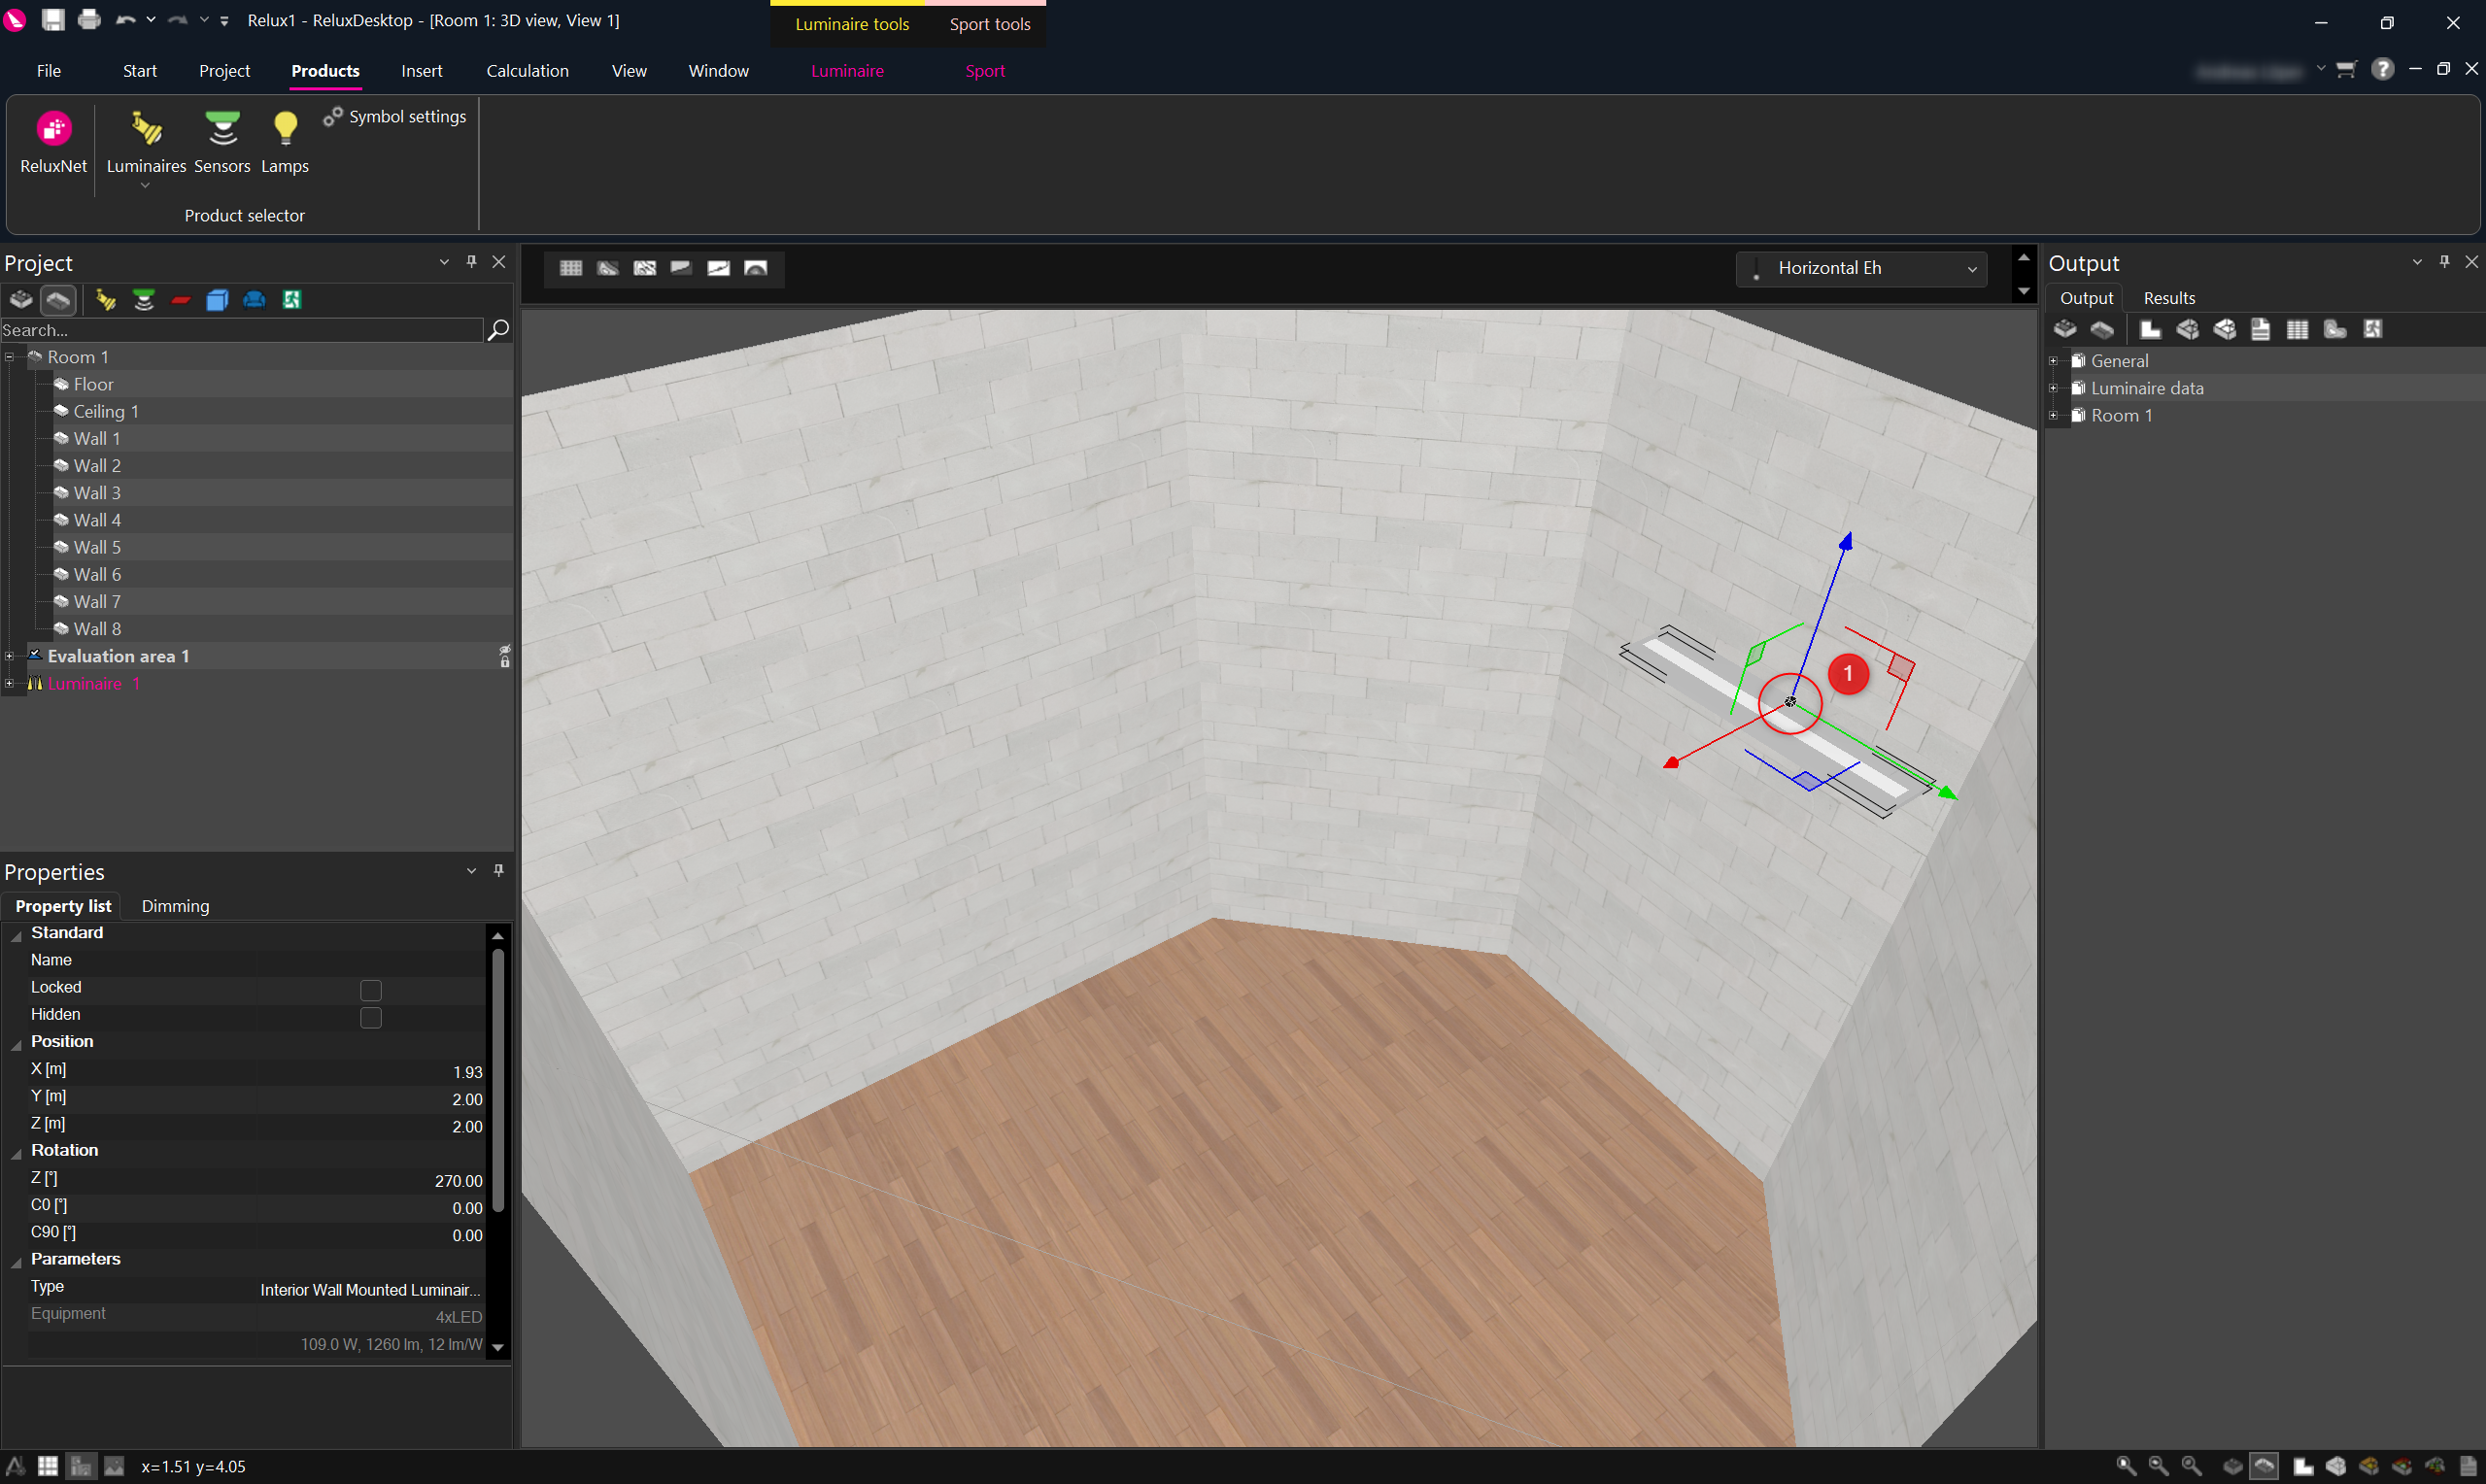
If you want to repeat this command, for an object that has already been inserted, select the object and then move the mouse pointer to the small black cube of the coordinate system on the object (1), its initial colour changes to yellow.
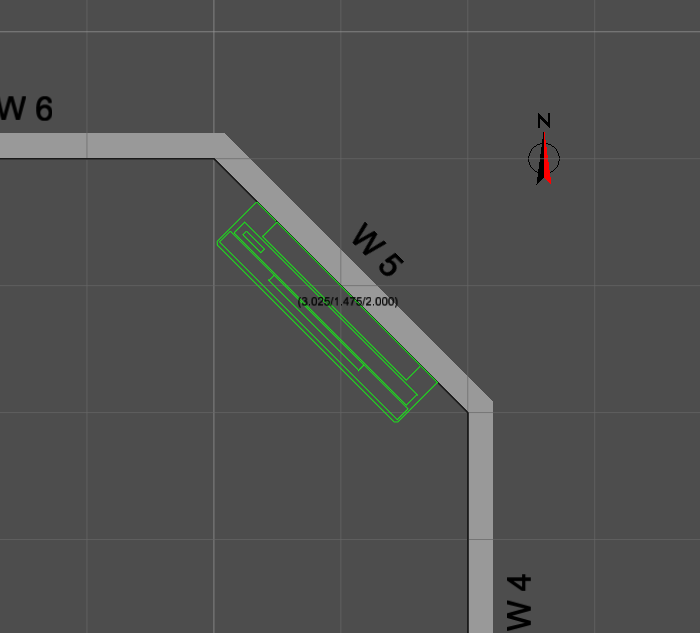
Keep the the left mouse button pressed and align the object with any external wall.
Whether the object turns the right way or not
will depend on where the origin point and the object axis of the object are
defined.
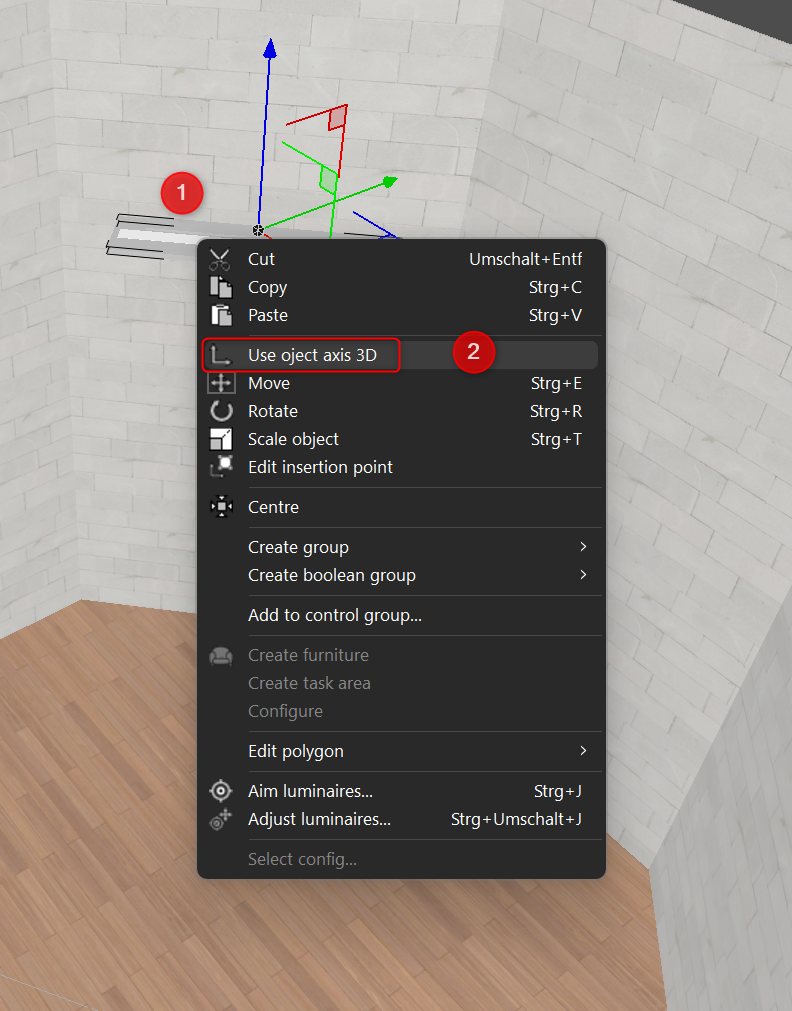
Click on the object, press the right mouse
button and select “Use object axis” .
If the zero point is on the rear side and the
Y-axis is parallel to that part of the object, as it should be, then there will
be no problem.