ReluxCAD for Revit –
Zonal Cavity
Calculate the optimal number of luminaires.

For one or more manually marked rooms, the attached dialog calculates the necessary number of luminaires for a specified illuminance.
This is the actual "playground" for electrical or lighting planners and offers a high level of flexibility.
 Zone 1: This permits the selection of a desired luminaire type for the individual room. Checking the mean illuminance can assist in finding the appropriate luminaire type.
Zone 2: Permits the definition of the mounting point.
Zone 3: Contains the nominal values allocated to a room by means of the usage profile and serves as the target that the software tries to achieve automatically.
Zone 4: Gives the planner a limited number of options as far as the automatic positioning of the luminaires is concerned.
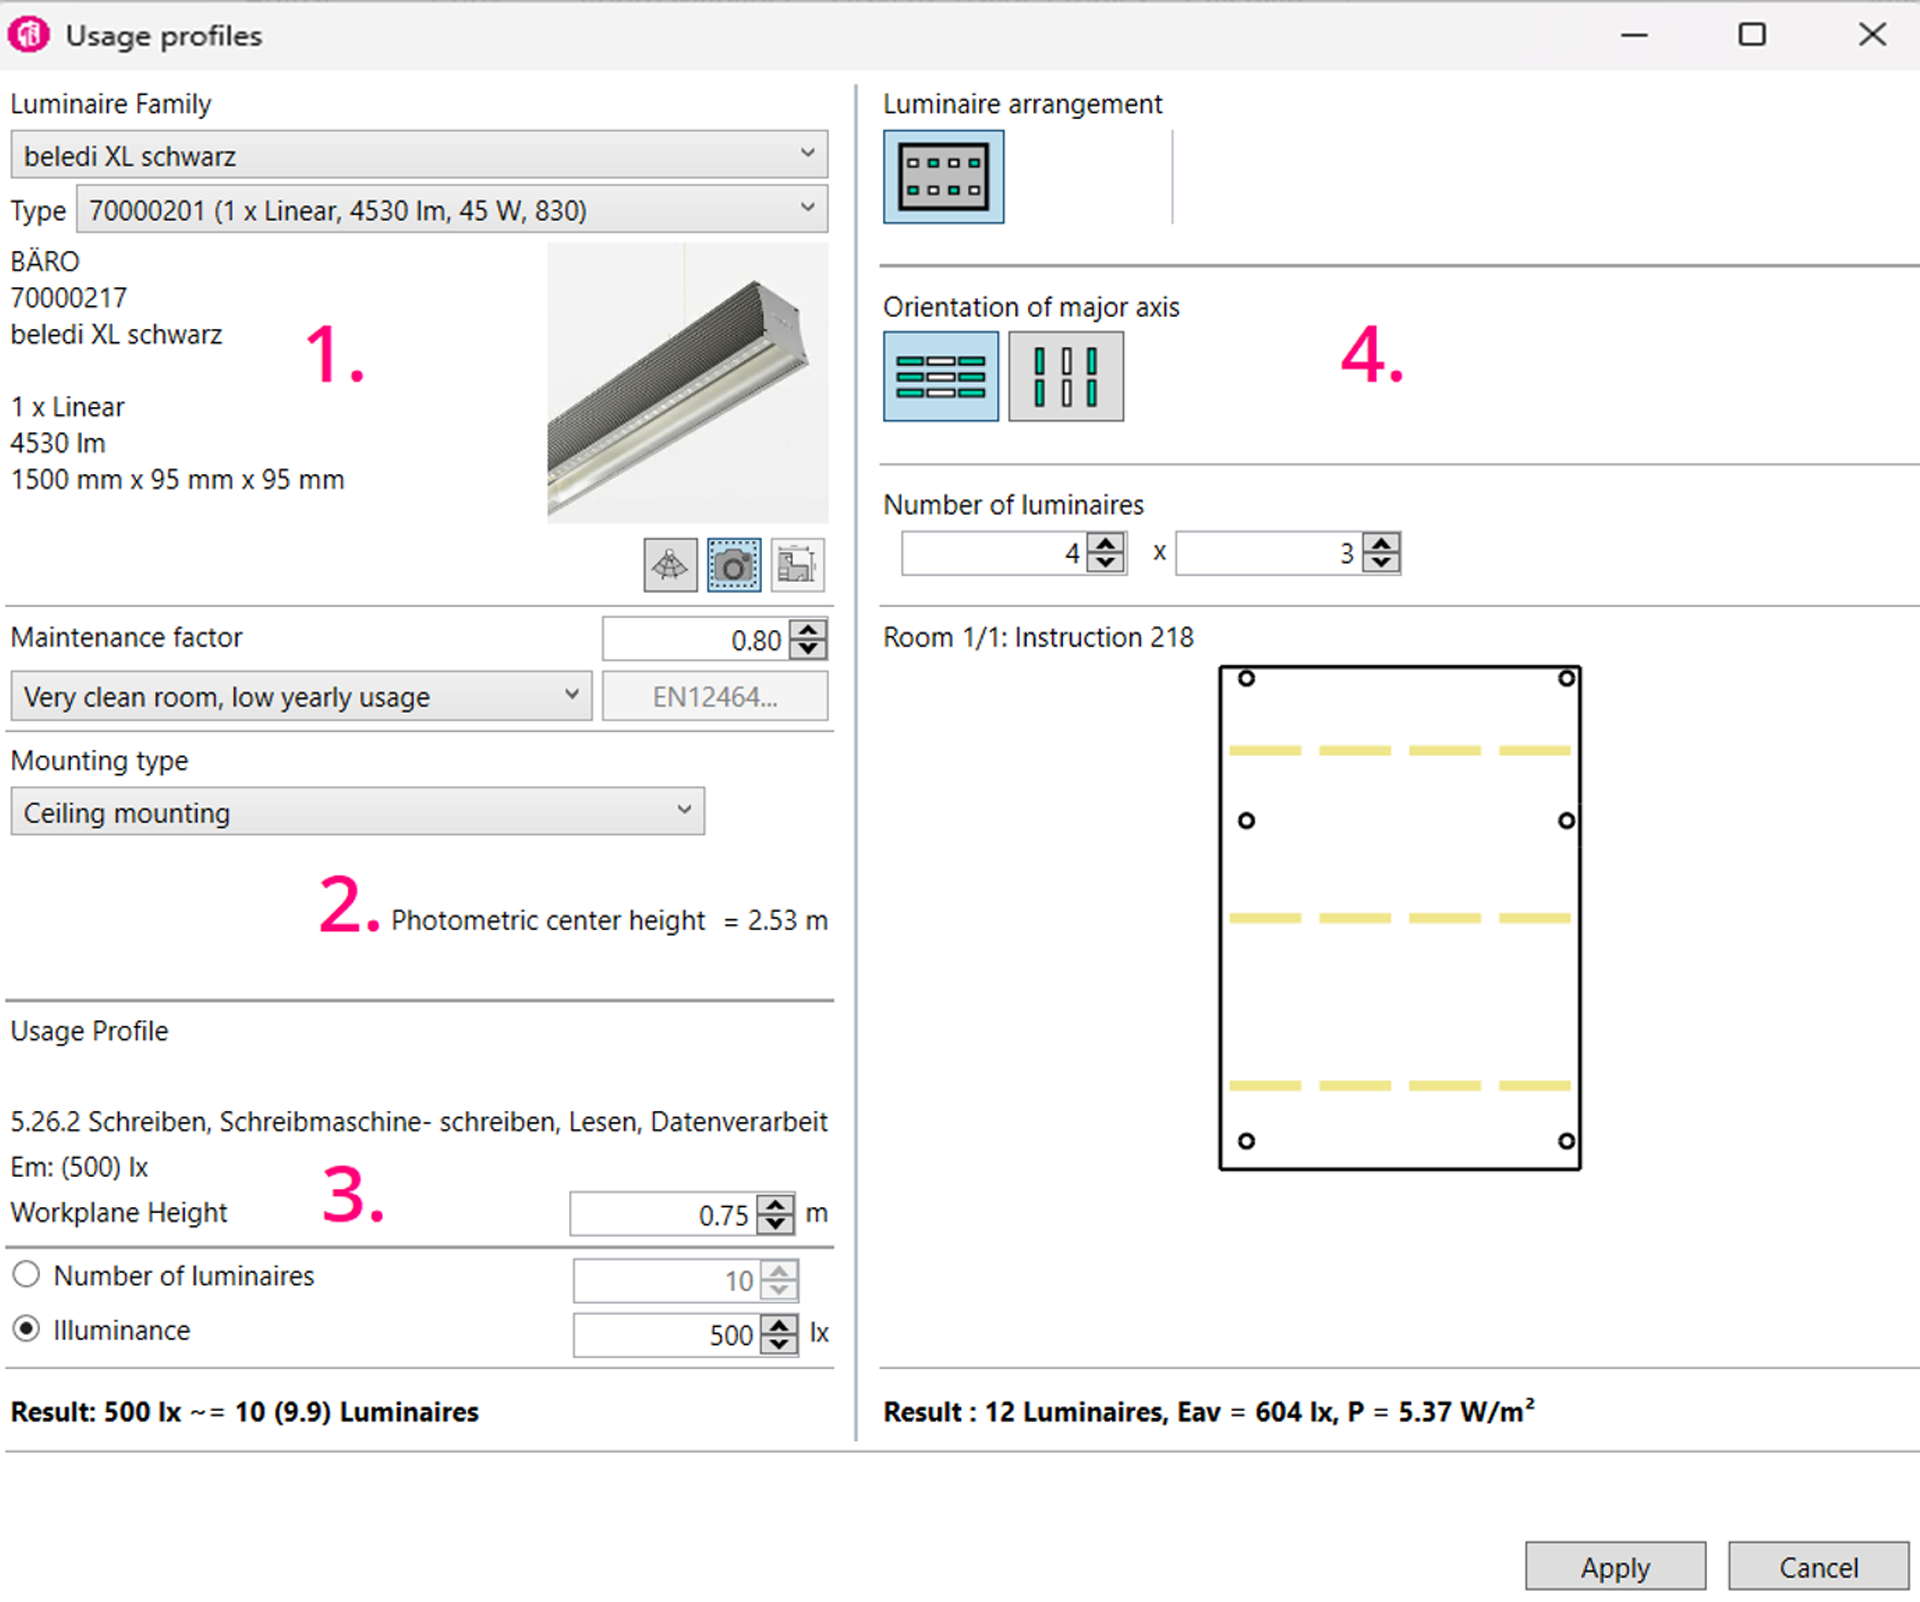
If the Zonal Cavity applies for several rooms, after the " Apply" command, the next room can be reached with the " Next room" command, and the procedure repeated"
The first step takes in the number of luminaires required for a room and their rough positioning. At a subsequent point in time, this can be influenced manually in the detailed planning.
Note: Manually positioned luminaires of a different luminaire type are not included in a calculation in this dialog!
Overview of ReluxCAD for Revit