ReluxCAD for Revit –
Room Manager
After choosing your luminaires, you can start with the Room Manager.
After selecting all the possible luminaires for a building, work can start with the Room Manager.
It is possible to obtain a quantity structure of all the luminaires required for a building from this dialogue.
It thus constitutes a powerful and easy-to-use tool.

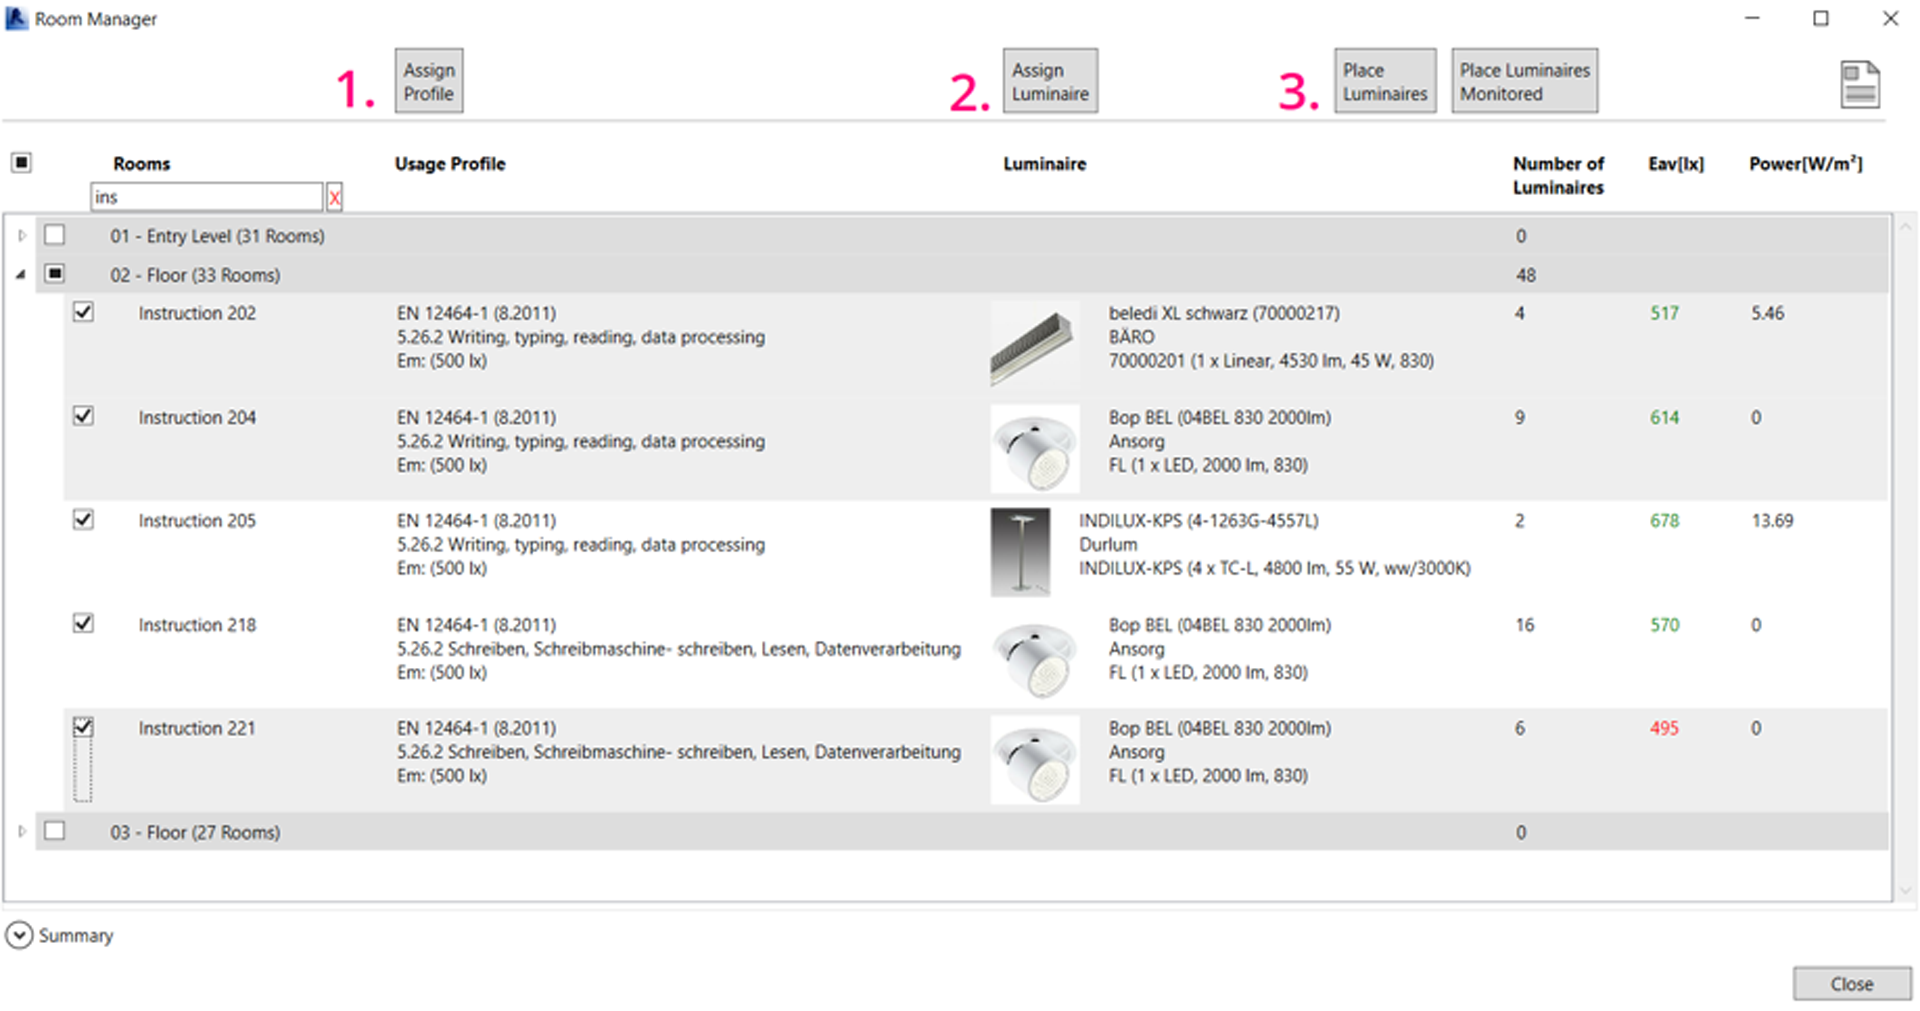
1. Mark the rooms in question. For each marked room, save a usage profile that contains the required quality standards as per the current standards. To do this, use the available filter options.
2. Allocate a standard luminaire to each marked room.
3. Let the software calculate and position the required number of luminaires for all marked rooms and storeys. This can be done in automatic or semi-automatic mode, with the latter allowing manual intervention in each of the rooms.
You will find more on steps 1 and 3 under:
>
Zonal cavity
>
Usage profiles
The mean illuminance shown applies exclusively for the luminaire type to the left of it. Manual interventions by the user in an individual room with luminaire types that differ from this are NOT taken into consideration for this.
Overview of ReluxCAD for Revit