ReluxCAD for AutoCAD
Compile your lighting plan in AutoCAD. Define the necessary room parameters for the calculations. Thanks to the bidirectional interface to the ReluxDesktop application, you obtain all the calculation results in the presentation mode you require for your CAD plan.
What does the software offer?
Plan your lighting installation directly in AutoCAD
ReluxCAD for AutoCAD provides planners and engineers with a powerful tool that simplifies and optimises lighting planning by enabling precise calculations, realistic visualisations and efficient integration into existing CAD workflows.
ReluxCAD offers extensive lighting calculation functions directly in AutoCAD, allowing planners and engineers to perform accurate and standard-compliant lighting calculations without having to leave the AutoCAD environment.
Using the built-in interface, you can transfer 3D objects from one application to another via copy & paste. A great performance for a low financial outlay!
Useful functions with an interface to ReluxDesktop

30 day trial version

Watch the Webinar FUN with RELUX, Episode 19
In the FUN with RELUX webinar series, Robert and Klaus show you how to create and edit Relux projects in AutoCAD and copy complex 3D objects from AutoCAD to Relux Desktop.
What all you can do with ReluxCAD for AutoCAD
Set up a project
- Create a Relux project file
- Define a Reference block field
- Select luminaires from 95 manufacturers libraries and options
- Allocate symbols to the luminaires
- Import luminaires from another AutoCAD drawing
-
Positioning Luminaires
- Position a Group of luminaires or a row of luminaires
- Position a circle of luminaires
Place luminaires
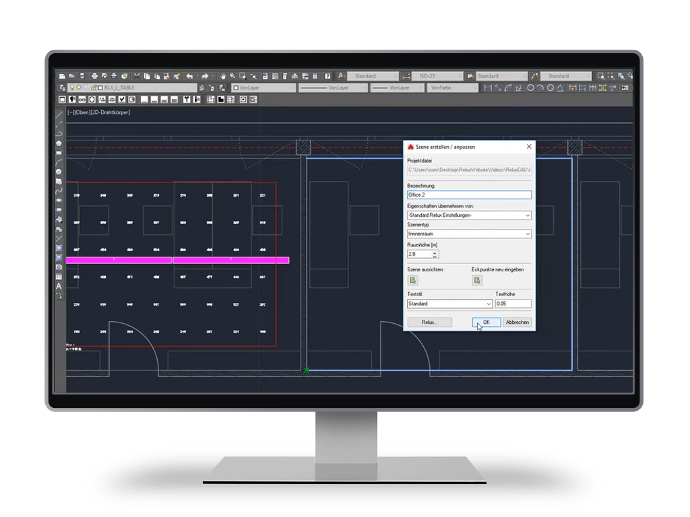
Draw a room
- Draw a room and create Scenes
- Name a scene
- Interface with Relux Desktop
-
Select an object type (Wall, doors, windows, cubes, measuring areas, etc…)
Draw Objects
Calculate a Scene
- Relux Interface
- Select a room
- Calculate
- Return to AutoCAD with imported calculations
- Insert an overview in DWG and CAD Layout
- Insert Isolines in DWG and CAD Layout
- Insert a project resume in DWG and CAD Layout
Present Results. Output
Part lists
- Configure a part list
- Add Symbols
- Description of luminaires
- Placed luminaires
-
Smooth exchange without loss
Synchronise changes with Relux
Luminaire Symbols
- Aligning Symbols
- Using Own and existing symbols
- Specifying style
- Calculations Results
- Luminaire information
- Labelling symbols
Inserting results and product photos in AutoCAD
3D objects
- Importing Relux projects into AutoCAD
- Exporting CAD objects into Relux
- Relux control centre with Building
Relux products that might interest you
Free Tutorials
watch our video tutorials on the various applications and topics.